|
|
|
|
|
|
Wood fired oven |
||||||||||||||||||||||
|
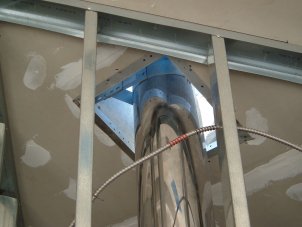
The images below are of an installation in California for a covered outdoor kitchen. The same installation procedures should be used for an indoor kitchen. The walls in this kitchen are wood framed, insulated and covered with cement backer board. The exterior is plaster over lath over vapor barrier over plywood. The ceiling is drywall over, insulated wood framing. The chimney system goes right though the roof joists and is supported by a brace attached to the joist. |
||||||||||||||||||||||
 |
||||||||||||||||||||||
 |
||||||||||||||||||||||
|
|
||||||||||||||||||||||
|
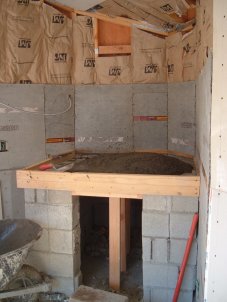
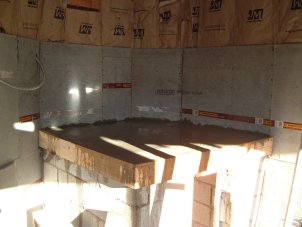
The oven support shelf should be 4 to 6 inches thick. Build forms for your support shelf using 2x material. Re-enforce the shelf with #3 or #4 steel rebar and place 1500 lbs or higher concrete mix in the form. Vibrate and finish concrete to form a level smooth support shelf for the oven. Allow shelf to dry overnight or longer if possible. Do not remove supports from under the shelf for at least 3 days. |
||||||||||||||||||||||
|
|
||||||||||||||||||||||
 |
 |
|||||||||||||||||||||
|
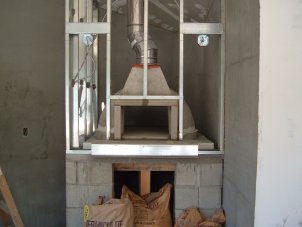
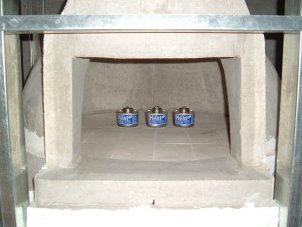
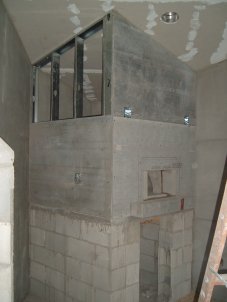
To install the oven, first place the rigid insulation boards on the concrete shelf and then assemble the oven per the installation instructions over the boards. Next, install metal framing to enclose the oven using 20 to 26 ga light gauge steel studs and track. Install electrical boxes, conduit, switches etc. You can make an extension shelf in front of the oven door using the same studs and track for framing |
||||||||||||||||||||||
 |
||||||||||||||||||||||
 |
||||||||||||||||||||||
|
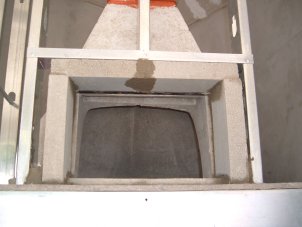
Place a non flammable material around the door opening to create a transition from the inside of the oven to the outside. The image on the left does not yet have the transition. The image on the right shows cement block caps used as the transition material. Note that since we knew the finish material was going to be 1/2 thick, we held the cement caps back by that amount so that the finished doorway would be perfectly flush once the granite was installed. |
|||||||||||||||||||||||
 |
|||||||||||||||||||||||
 |
|||||||||||||||||||||||
|
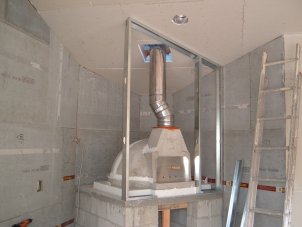
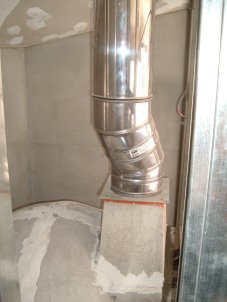
The chimney system was installed without screws at the anchor plate, because the system has plenty of support in the form of brackets. The anchor plate was installed using high temperature caulking only and allowed to cure overnight. The chimney was installed the next day and is made up of anchor plate, a pair of 30 degree elbows, 6 of pipe (one 4 and one 2 sections) and a cap. |
|||||||||||||||||||||||
 |
|||||||||||||||||||||||
 |
|||||||||||||||||||||||
|
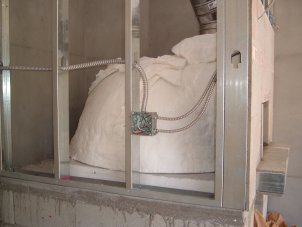
Place the ceramic fiber blanket over the oven and cover the entire structure with cement backer board. Note the extension shelf in front of the oven on the image on the left the shelf has cement backer on top and bottom only. The image on the right shows the shelf completely covered with the cement backer and is ready for the finish material. Leave a piece of the backer off (right image) to allow you to place the vermiculite insulation in the structure. Fill the structure with insulation to three inches above the top of the oven. Once the insulation in installed, close the structure. You are now ready for your finishes. |
|||||||||||||||||||||||
|
Please visit our installation gallery to see finished ovens and for inspiration and ideas on how to finish your own wood fired oven. |
|||||||||||||||||||||||
|
|||||||||||||||||||||||